
A popular dinner time topic at my house is, ‘if we had a t-shirt business, this is a saying we should put on the shirts’. For years, my husband and kids have talked about this. I think it might have started when we visited Golden a few years ago and walked into an old school t-shirt store where you could pick the colour and design of your shirt. A few times we even thought about buying some iron on paper for our home computer and customizing some shirts, but … I don’t like the crunchy, obviously homemade look of those shirts.

So, obviously, I was thrilled to work with the Cricut Easy Press 2 and start creating some custom tees and sweatshirts ahead of gift giving season. (PS: My kids are totally getting match-matchy tees for Christmas – and no, they don’t read my blog!) When I started planning my project my main concern was that the end result of my would look, well, poorly homemade. Thankfully, that’s not the case at all, my first project looks just like something I would have ordered online.
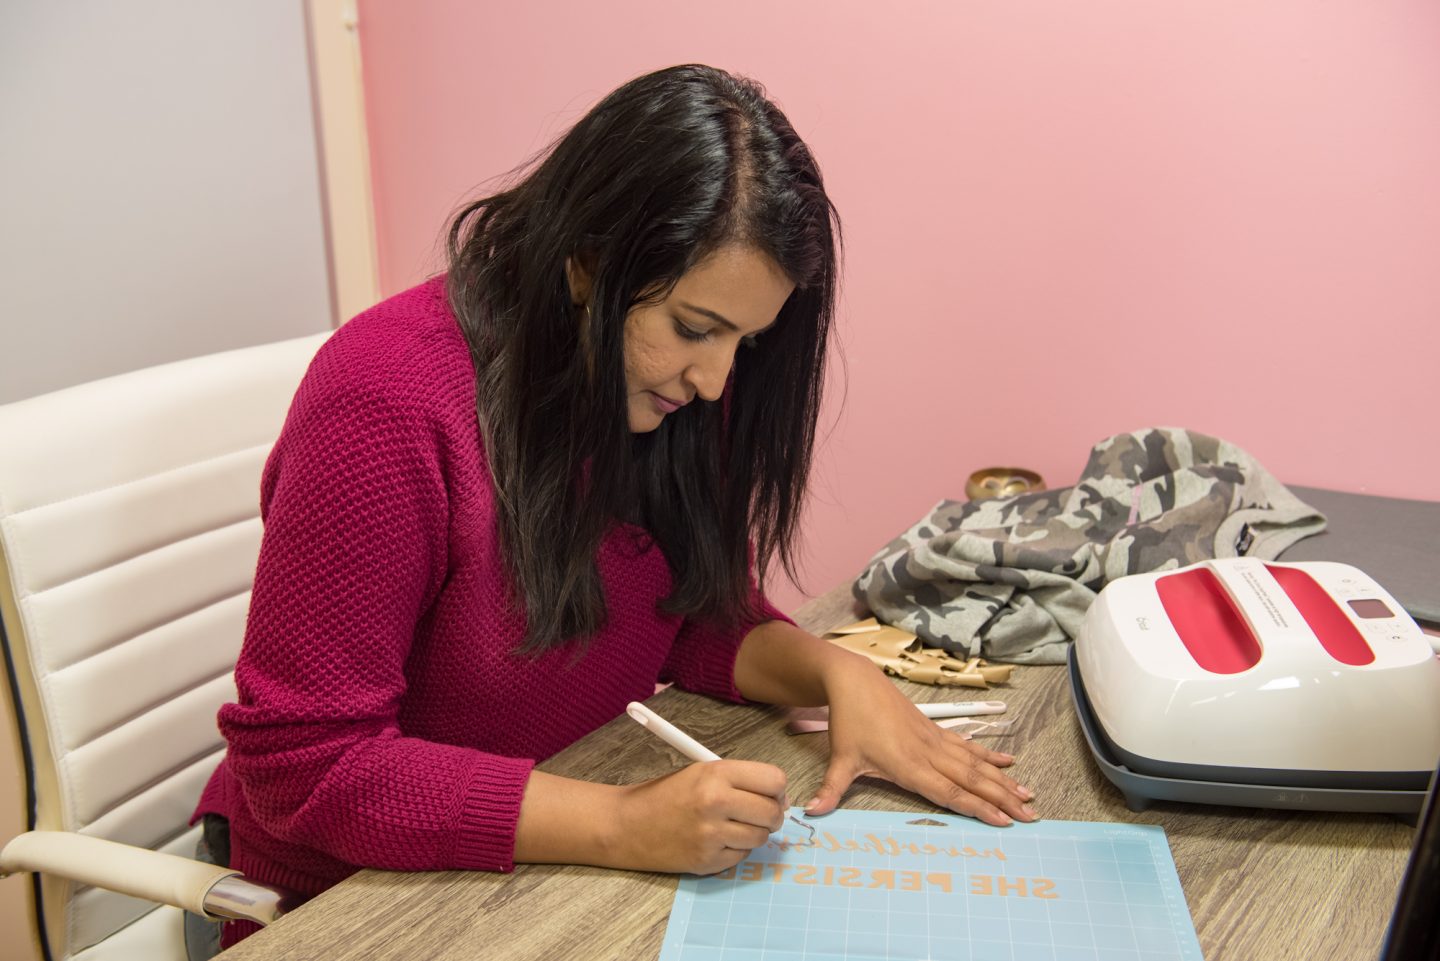
I used the Cricut Maker to create my vinyl cut-out, but I believe from some online research that you can use the Cricut Easy Press with any iron on material as long as you follow the directions on both the vinyl, and on the Easy Press. Since this was my first time doing an iron on project, I came up with a few tips that I thought I would share with you guys.
Tips for a Successful Iron-On Clothing Project:
[wc_fa icon=”heart-o” margin_left=”” margin_right=”” class=””][/wc_fa] Take some time thinking about the colour of the vinyl you will apply to your shirt. It’s important that there be enough of a contrast for your quote to be read.[wc_fa icon=”heart-o” margin_left=”” margin_right=”” class=””][/wc_fa] Choose a quality vinyl. I only used the Cricut brand heat transfer vinyl, but I read a few people’s posts who didn’t have great experiences with heat transfer, and in each case it seemed like they used a budget vinyl
[wc_fa icon=”heart-o” margin_left=”” margin_right=”” class=””][/wc_fa] Think about the thickness of your font and the number of cutouts there will be in the final piece. If your font is too fine or thin, you may not be able to read it on the final piece.
[wc_fa icon=”heart-o” margin_left=”” margin_right=”” class=””][/wc_fa] Make sure you print your quote as a mirror image! You’ll be flipping it around to iron on.
[wc_fa icon=”heart-o” margin_left=”” margin_right=”” class=””][/wc_fa] Most important, follow the heat setting directions on your Easy Press Iron On. This is probably the key element to having your design go on smoothly, and last.
So technically, you can do an iron on project with a standard home iron too, but I think there is some great value in getting an Easy Press 2. Even though I can’t compare it to older models, here are the things I love about this press.
- It comes with a safe and secure base – irons are a hot hazard waiting to happen, and this gives me a sense of security.
- There is an exact temperature panel on the Easy Press 2. I don’t have a very expensive iron, and I would have to sort of guess if it hit the right temperature
- There is so much support online, and guides to know the exact heat needed for each type of project, and how long you need to hold the iron (there is even a timer to tell you when to lift it). It is practically fail proof, which I think is so important for people who make projects at home. I do not like DIY products that set me up for failure, that is why I love the Easy Press 2 (and for that matter the Cricut Maker too).
Whenever you receive a product from a brand to review, there is a certain element of ‘is she telling the truth?’ from the readers. I have to tell you guys, so far the Cricut Maker and Easy Press 2 have been so user friendly and easy that I have to cons. (Ready my thoughts on the Maker here). That being said, I’m just starting to plan out some projects using different materials and some more complex cutting & layering techniques, so I promise to keep you updated as I work with the machine more.
PS: I’m already dreaming up project ideas for Lohri, but if there are any other desi holidays or crafts you want me to cover, please let me know!
This is a sponsored conversation written by me on behalf of Cricut. The opinions and text are all mine.

Hi Thandi! These custom shirts are very much attractive, have you think of spreading your “print idea” into large scale like custom printing on the sports league banners, and maintaining some real high banners for certain organizations?
I had pitch these idea and it turn out to be quite great. Have a look on my site to explore more
of these ideas.
Thanks!